Measure the exact crossbars, mounting rails, support points, and clearances against the chosen rooftop tent's instructions.
On this page
Rooftop-Tent Bar Dimensions, Spread, and Mounting Requirements
A vehicle selector may identify a rack that attaches to your car without checking whether your tent’s mounting rails fit the installed bars. Measure the rack on the vehicle and compare it with the exact tent and bracket instructions. Treat a missing measurement as a fitment question, not as a pass.
Measure both bar spreads
Rooftop tent guides use two different spread measurements:
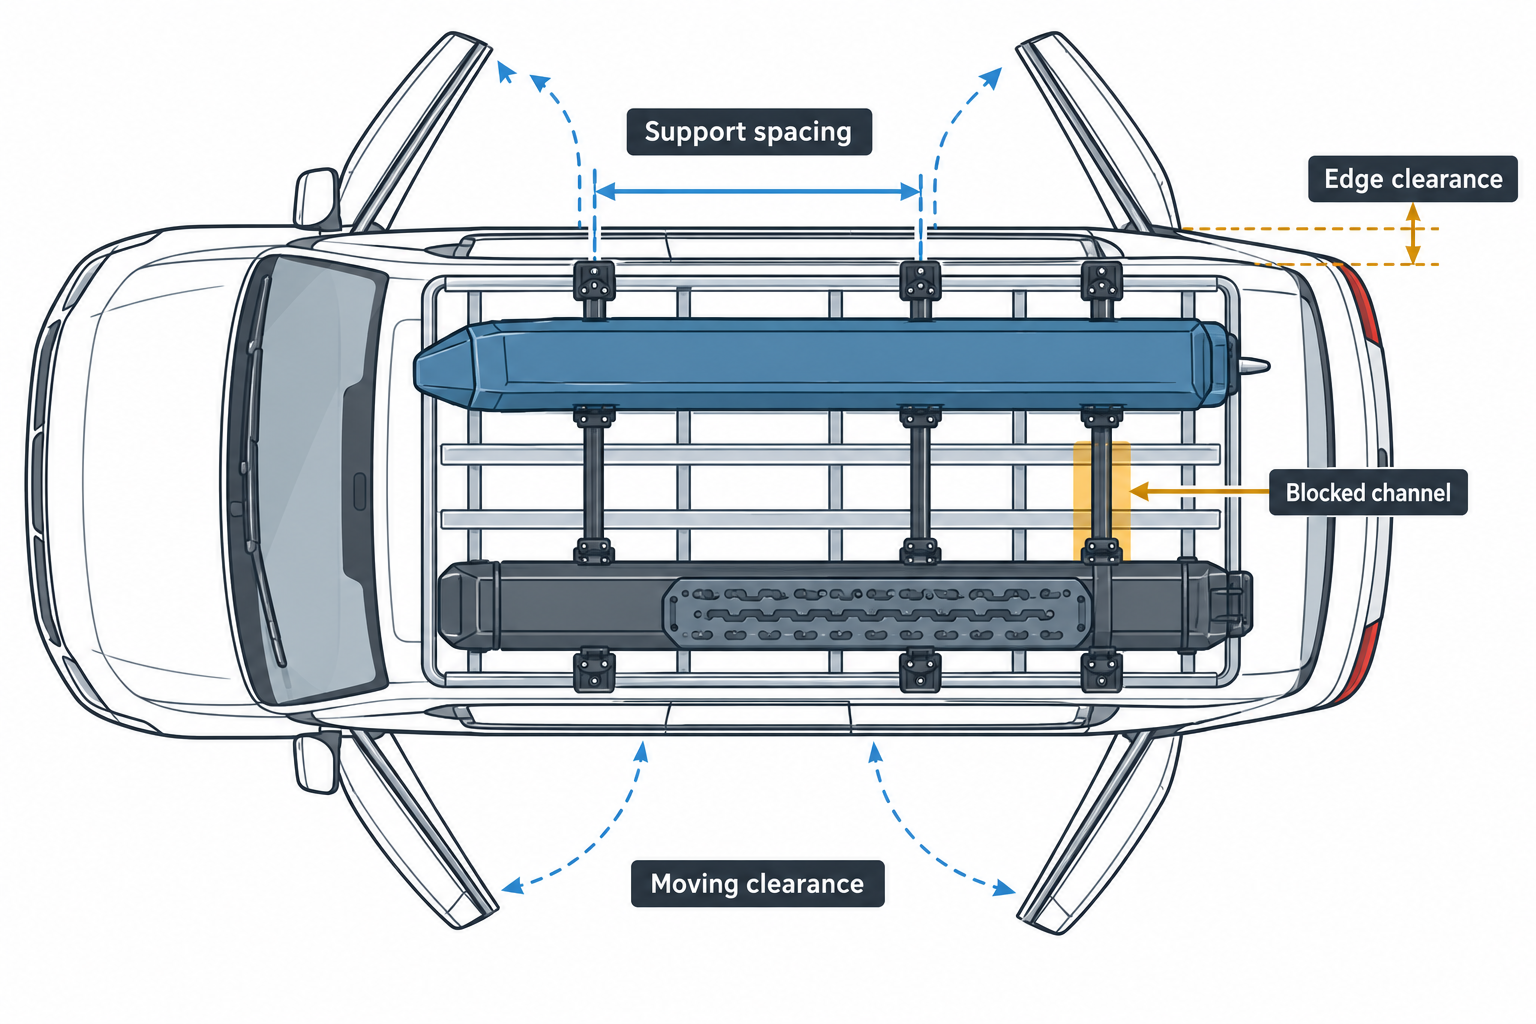
- Front-to-back spread is the distance between the crossbars along the vehicle’s length. Measure from the center of one bar to the center of the other unless the tent manual defines a different reference.
- Side-to-side support is the distance between the left and right points that support the tent across the vehicle. Check the tent’s rails and the bar support positions; a wider roof does not automatically mean the tent is supported at the required points.
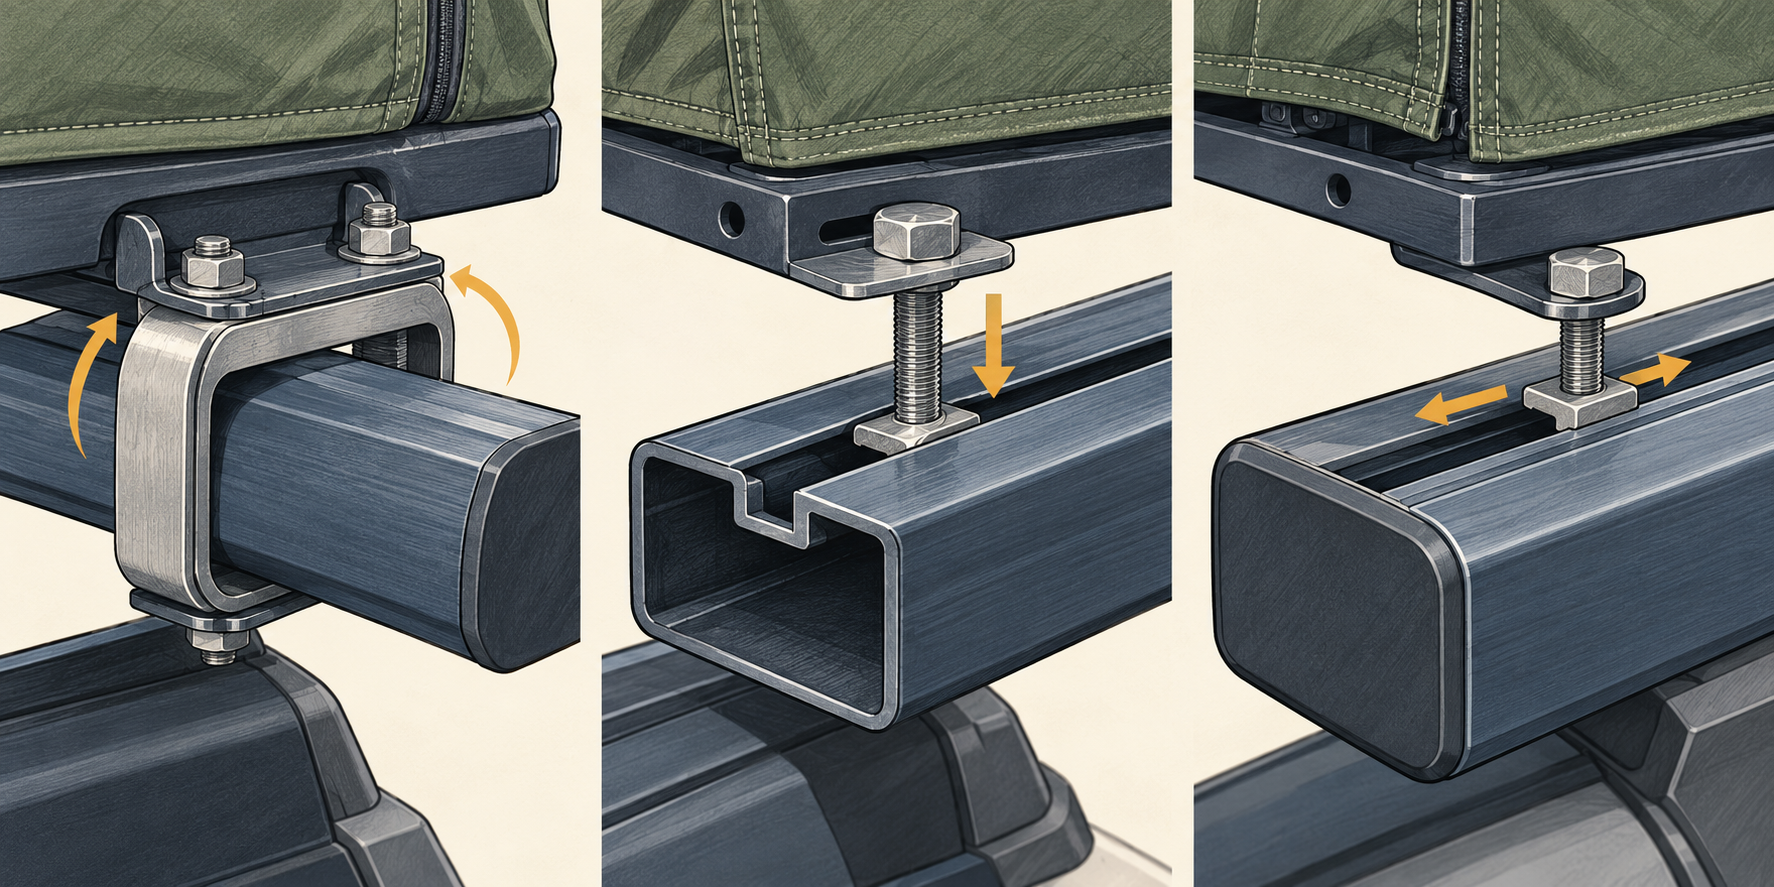
Also measure the crossbar’s width and height where the clamps or brackets sit. Check whether the tent attaches with clamps, bolts through open slots, T-track hardware, or another specified interface. The bar must fit inside the bracket’s allowed dimensions, and the hardware needs access to its full mounting surface.
Use the exact model’s limits
There is no single roof-tent spread or bar profile for every tent. Thule’s rooftop-tent guideline calls for at least 28 inches (70 cm) of front-to-back spread, then gives different side-to-side minima for named tent models. For example, it lists 31 inches for Approach M/L, 32 inches for Basin, and 34 inches for Kukenam. The model’s own manual and any special mounting position control.
Other makers use different values and even different instructions for related models. iKamper’s current Skycamp 4.0 Trio Help Center guide and product page give different spread ranges and minimums in their mounting, FAQ, and specification sections. The pages do not reconcile those values. Compare the source sections in the iKamper model requirements lookup and ask iKamper to confirm the requirement for your exact tent before relying on a measurement near a stated minimum. These figures do not apply to another tent or bracket.
Yakima’s current compatibility guide also makes approval model-specific. A bar or platform marked compatible still needs the listed rack or leg, vehicle-fit type, and roof-load checks to pass for the chosen tent. Do not reuse measurements from an older SkyRise model for a newer Yakima tent.
Check support, position, and clearance
The bars must sit at supported positions on the vehicle’s rack system. Check the tent rails against the bar locations and look for unsupported overhang, cantilevered rails, or a bracket that sits beyond the maker’s allowed position. Some manuals require the tent to sit parallel to the vehicle; others give a product-specific overhang or orientation rule. Do not move a mounting bracket or drill the tent to make an incompatible system fit.
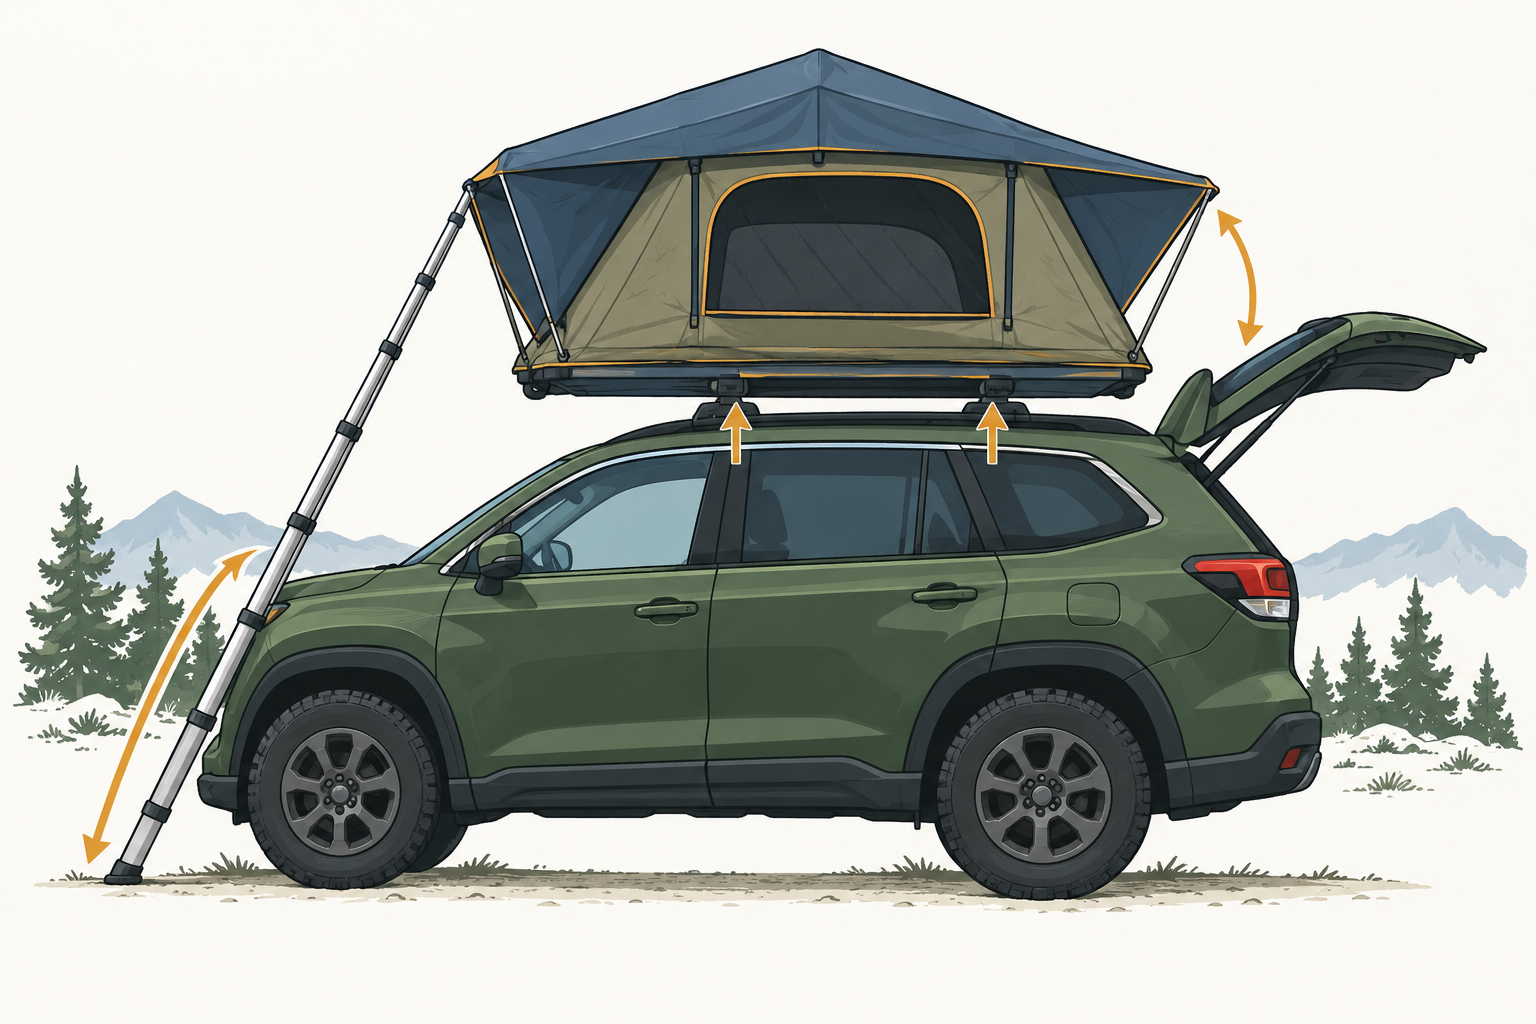
Check more than the closed tent footprint. Confirm that the tent can open fully, the ladder reaches the ground in its intended position, the hatch and doors clear the tent, and the mounting hardware can be inspected and tightened. A pickup bed rack or canopy adds different concerns such as bed length, rack height, cover access, and ladder reach; see the Tundra setup guide for one product-maker example.
Bracket instructions can add fit and inspection steps beyond the tent’s own manual. For example, Rhino-Rack’s Pioneer Top Mount Accessory Bracket 53101 instructions tell installers to measure rail width and select one of three configurations. They define vehicle load to include the rack system and direct users to apply the lower applicable limit from the vehicle maker. The copy checked here is dated June 2021; confirm that Rhino-Rack has not issued a newer instruction and that bracket 53101 is the exact part for your system. This example does not establish fit for another bracket, vehicle, or tent. Follow its stated connection checks after a short drive and at regular intervals, plus any current instructions supplied with your equipment.
A practical measurement record
Before buying or installing, write down:
- Vehicle year, trim, market, roof type, and the installed rack parts.
- Tent model, bracket generation, and the exact manual revision.
- Front-to-back bar spacing and side-to-side support spacing.
- Bar width and height at every clamp or bolt location.
- Rail, T-track, slot, or clamp interface and any required adapter.
- Tent position, overhang, support points, hatch clearance, ladder path, and opening clearance.
- Each manufacturer’s fit status and load limits for that exact setup.
Measure the assembled rack, not a diagram or a catalog photo. Recheck after positioning the tent, then follow the tent and rack instructions for final tightening and inspection. For the broader vehicle and tent decision, use the eligibility guide.
Sources and product references
Use these references to check the current instructions and fit information for your market and exact setup.