Follow the INNO INA951/INA952 instructions for snowboard binding placement, base-rack spacing, and pre-drive checks.
On this page
INNO INA951/INA952 Snowboard Loading and Clearance Checks
The INNO INA951 and INA952 instructions describe specific ways to position a snowboard so its bindings do not contact the vehicle roof or the carrier’s mounting points. Those steps apply to this carrier family only. They do not establish that an INA951 or INA952 fits a particular vehicle or crossbar.
The current INNO USA product page lists the INA951 for up to six fat skis or four snowboards and says its mounting system fits aero, square, and most factory crossbars. These product statements do not identify the exact crossbar dimensions or a vehicle-specific fit. Confirm the exact model and current instructions for the market where you will buy and use the equipment, then check the selected vehicle, base rack, and carrier as one setup.
Check the mounting space and base rack
Before loading equipment, confirm that the base rack is stable and strong enough for the carrier, then tighten the carrier’s bolts and nuts as the instructions show. INNO’s manual also requires at least 20 inches (500 mm) of space in front of and behind the base rack. It does not describe this measurement as the distance between the front and rear crossbars, so do not use it as a bar-spread specification.
The manual covers both INA951 and INA952, but broad wording such as “most crossbars” is not a selected fit result. Follow the current carrier and base-rack instructions for the exact bar profile and vehicle. If the mounting hardware cannot be installed as shown, stop and ask INNO or the rack maker to confirm the combination.
Position the snowboard bindings
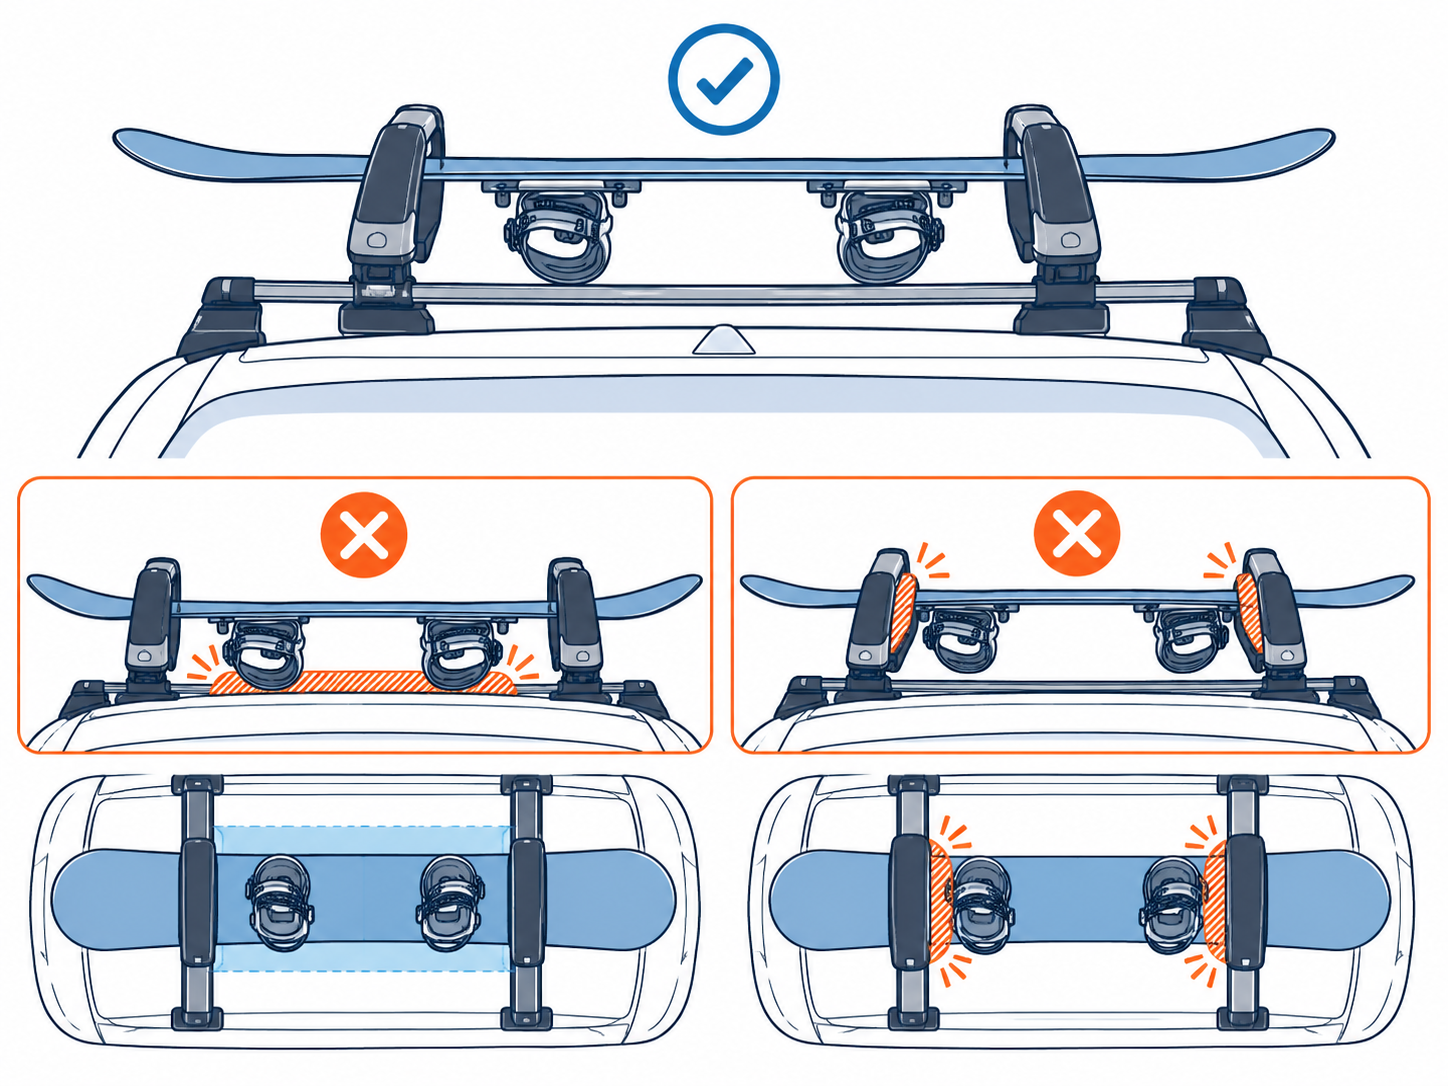
When the snowboard is loaded with its bindings facing down, the INNO instructions say to strap the bindings so they do not touch the roof before placing the board on the carrier. Position the board so its bindings do not contact the carrier’s memory mount. If a binding touches that mount, change the board’s position.
The manual says to place the bindings between the front and rear attachments when possible. Use that placement when the board geometry allows it. Check the actual board and rack together; a product’s stated capacity does not guarantee that every board shape or binding position will clear the roof.
Follow the special front-binding condition
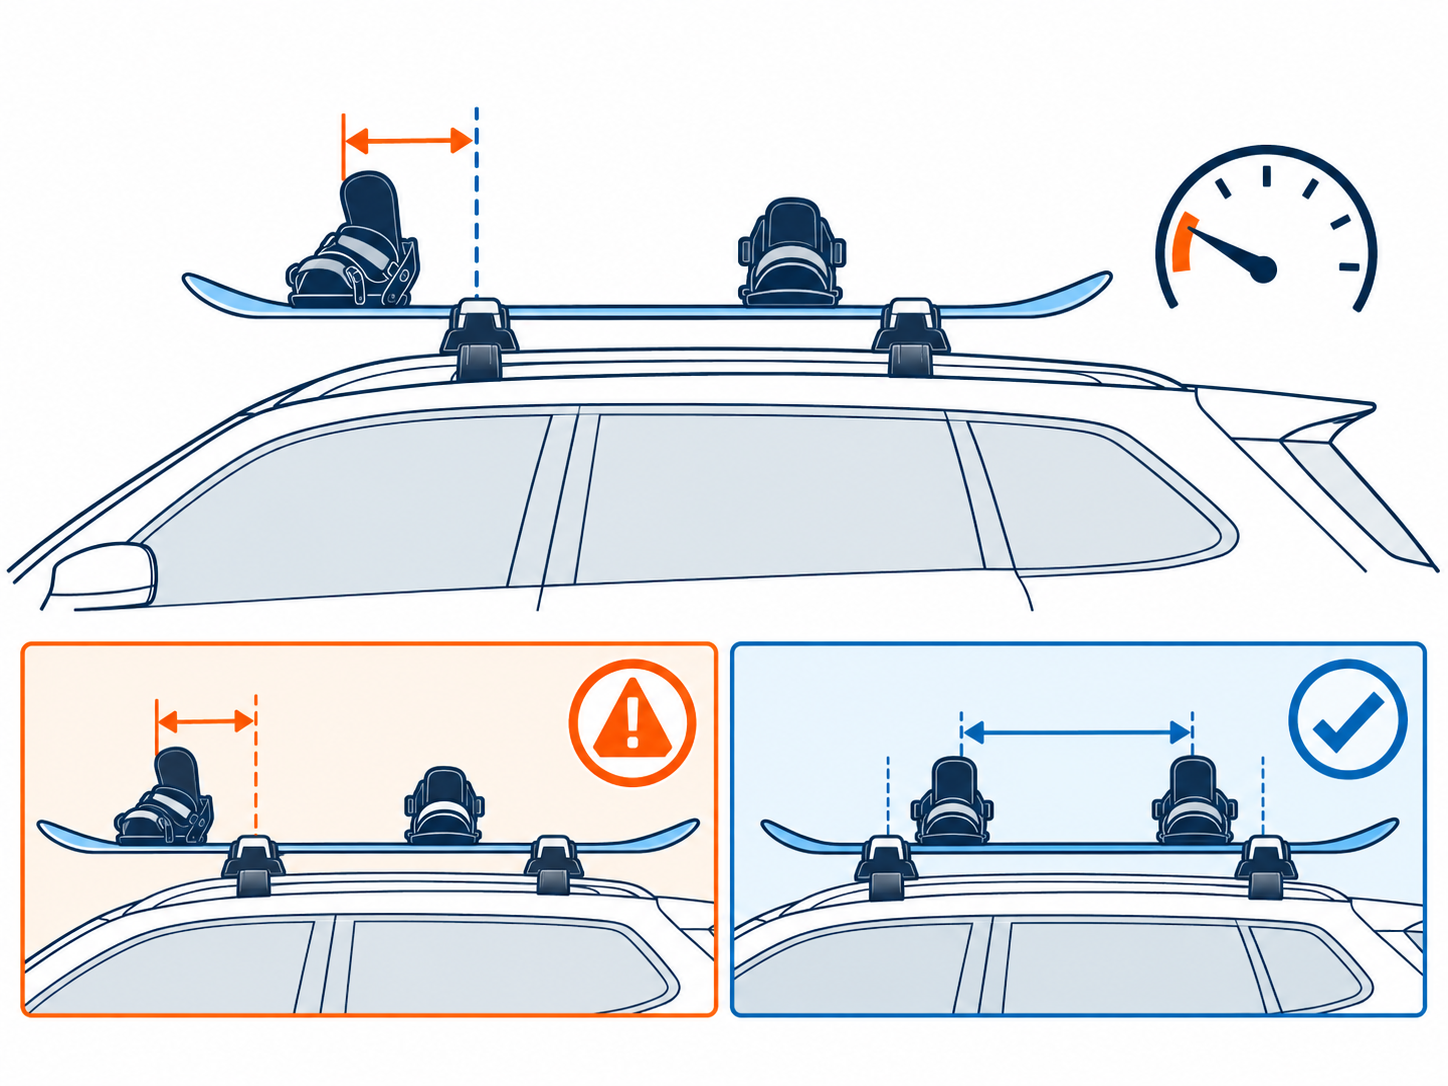
If one binding must sit ahead of the rack, the manual gives a separate configuration: face the snowboard upward and keep its projection ahead of the front rack within 35 inches (900 mm). The accompanying diagram marks that arrangement at 50 mph (80 km/h) or less. These limits belong to the illustrated front-binding configuration; do not apply them to other carriers or treat them as the speed limit for every INA951/INA952 setup. Any stricter vehicle, product, or local limit still applies.
If you cannot position the board without binding contact or outside the manual’s stated conditions, do not assume that the setup is acceptable. Check the exact product instructions with INNO or use a different verified arrangement.
Complete the pre-drive checks
Before driving, confirm the base rack is secure, all carrier fasteners are tightened, and the carrier is locked as instructed. INNO says these carriers are for skis or snowboards, not other cargo. The manual does not provide a numeric carrier weight limit or a vehicle-specific roof-load allowance.
Count the crossbars and feet, carrier, and equipment in the vehicle’s roof-load calculation. Follow the lowest limit in the vehicle, base-rack, and carrier instructions. For the vehicle-to-carrier verification sequence, use the winter-carrier fit guide. The measurement guide can help you record board dimensions and compare them with the selected carrier’s stated geometry.
Sources and product references
Use these references to check the current instructions and fit information for your market and exact setup.