Follow the Polestar 2 UK load-carrier procedure and check the exact vehicle, carrier, and roof-load limit before installation.
On this page
Polestar 2 Panoramic-Roof Load Carriers: UK Installation Checks
Polestar’s UK manual gives a vehicle-specific procedure for fitting its load carriers to the Polestar 2. The instructions use attachment points in the door frames and carrier feet at the roof edge. They do not provide a numeric roof load limit or identify a part number for every model year. Confirm the carrier and current manual for your exact vehicle before fitting or loading it.
Match the instructions to the vehicle
The procedure summarized here is in the 2025 UK Polestar 2 manual. It directs owners to use Polestar load carriers and to follow the carrier’s own positioning decal. A retailer listing or a carrier that appears to line up with the roof edge does not establish that it is the correct part for a particular vehicle.
A separate 2024 UK Polestar 2 manual describes the roof as a panoramic roof made from tinted glass. These are different manual editions. Use each source only for its stated year, and check the roof and carrier instructions that apply to your own car. Neither page supplies a glass-clearance measurement or confirms that a particular carrier fits every Polestar 2.
Follow the load-carrier procedure
The 2025 instructions include these checks:
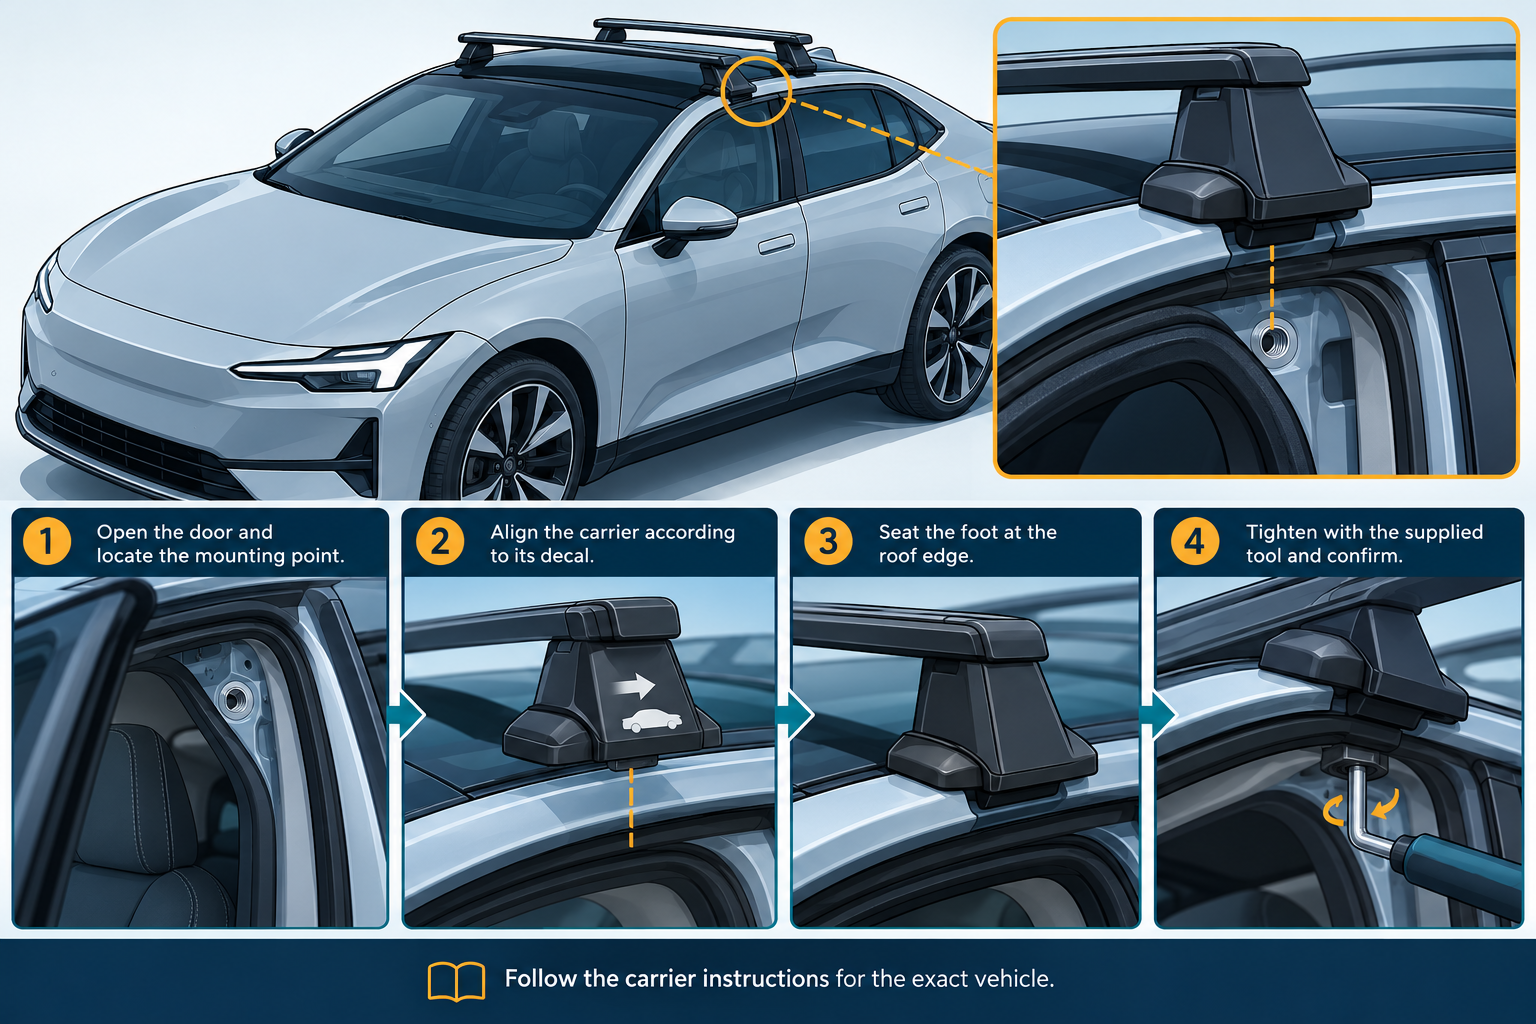
- For a first installation, prepare the carrier trim to the length required by its instructions. The arrows on the trim point toward the front of the car.
- Open the doors and locate the two threaded mounting points in each door frame. Clean those points and the roof areas that the carrier feet will touch to reduce the risk of paint damage.
- Use the decal under the carrier to identify its position. Do not estimate bar placement from another vehicle or carrier.
- Align the brace pins with the door-frame mounting points. Seat each foot at the roof edge and check that its curved surface follows the matching roof edge. Keep the brace engaged while fastening it.
- Tighten the brace alternately on both sides with the supplied tool until it clicks. Refit the covers and lock them as the instructions show.
Use the complete current instructions and diagrams for the carrier in hand. The summary above does not replace the installation procedure or establish that a different carrier uses the same parts or steps.
Count the full roof load
Polestar’s 2025 instructions say the maximum permitted roof load includes the empty load carriers, any accessories, and the cargo. They direct owners to the vehicle’s owner’s manual for the maximum and say not to exceed the car’s total weight limit. The carrier page itself gives no numeric vehicle roof-load value, so check the manual for your exact car rather than treating a product rating as the permitted load.
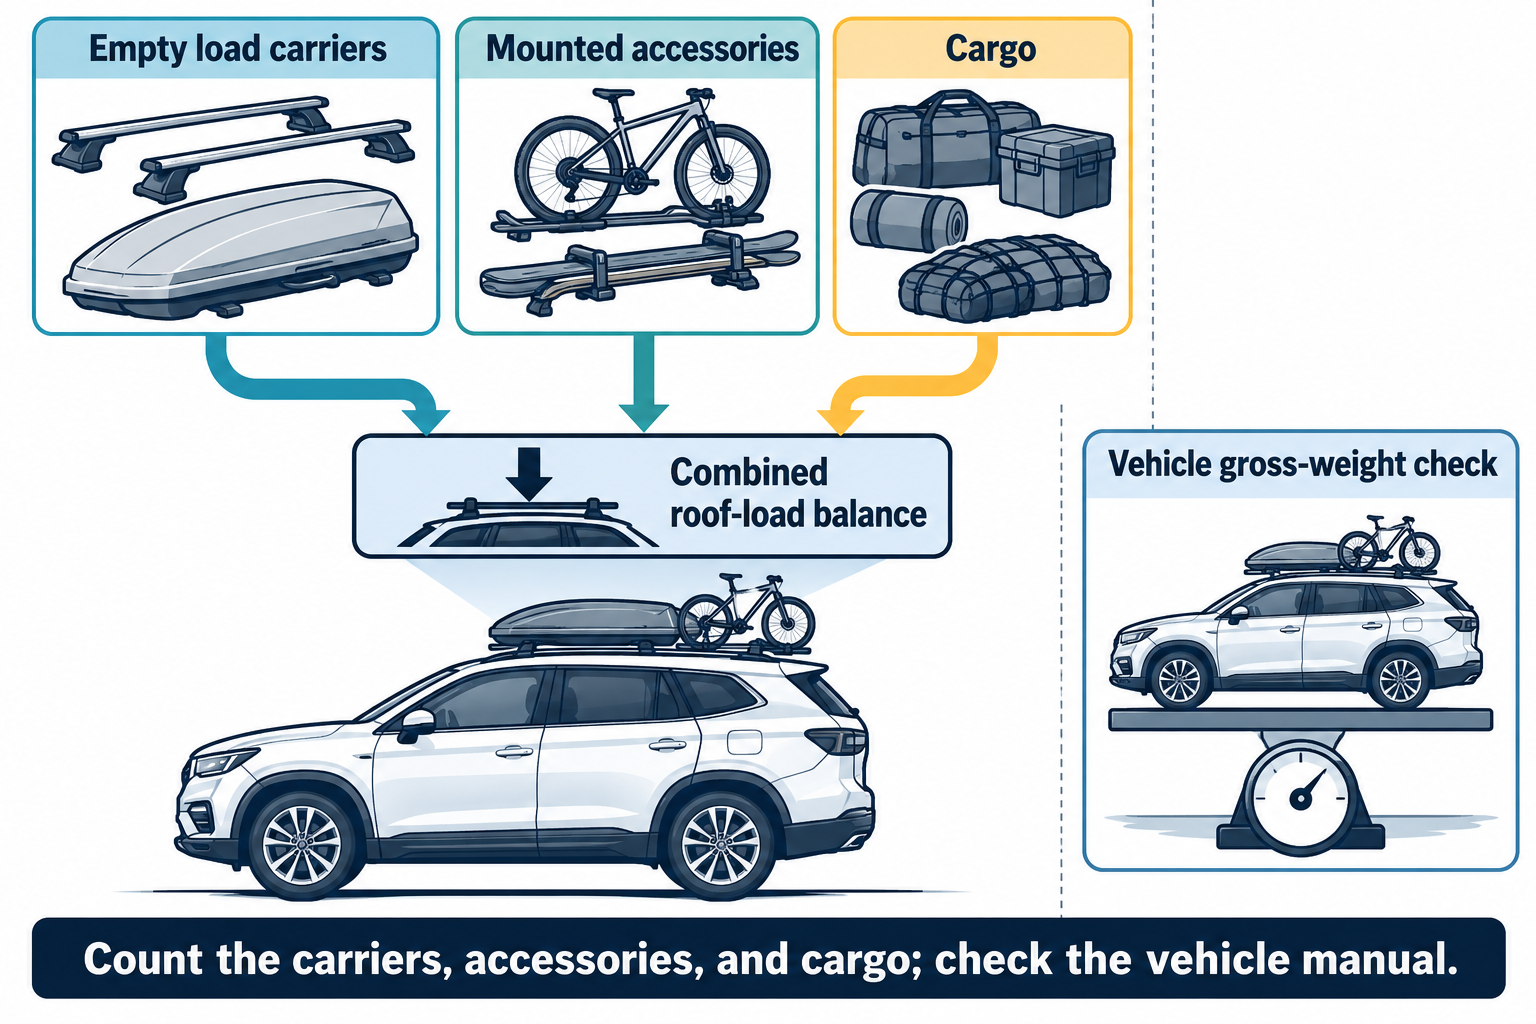
The manual also calls for even load distribution, a low center of gravity, secure cargo, and regular checks of the load. Check the bolted joints and brackets after a short drive and at regular intervals. Roof loads can change handling and crosswind sensitivity; follow the vehicle and carrier instructions and all applicable speed limits. Polestar recommends removing the carriers when they are not in use.
What remains vehicle-specific
The cited manual pages do not identify a carrier part number for every year, provide a numeric roof-load limit, or give a glass-clearance measurement. They also do not establish one procedure for every market or carrier revision. Confirm the matching carrier and load limit in the current instructions for your vehicle before installation. For the broader approval sequence, see the EV and glass-roof rack approval guide.
Sources and product references
Use these references to check the current instructions and fit information for your market and exact setup.