Use the rack’s current instructions to inspect its attachments, clean it safely, store loose parts, and recheck the system before carrying a load.
On this page
How to Inspect, Clean, Store, and Recheck a Roof Rack
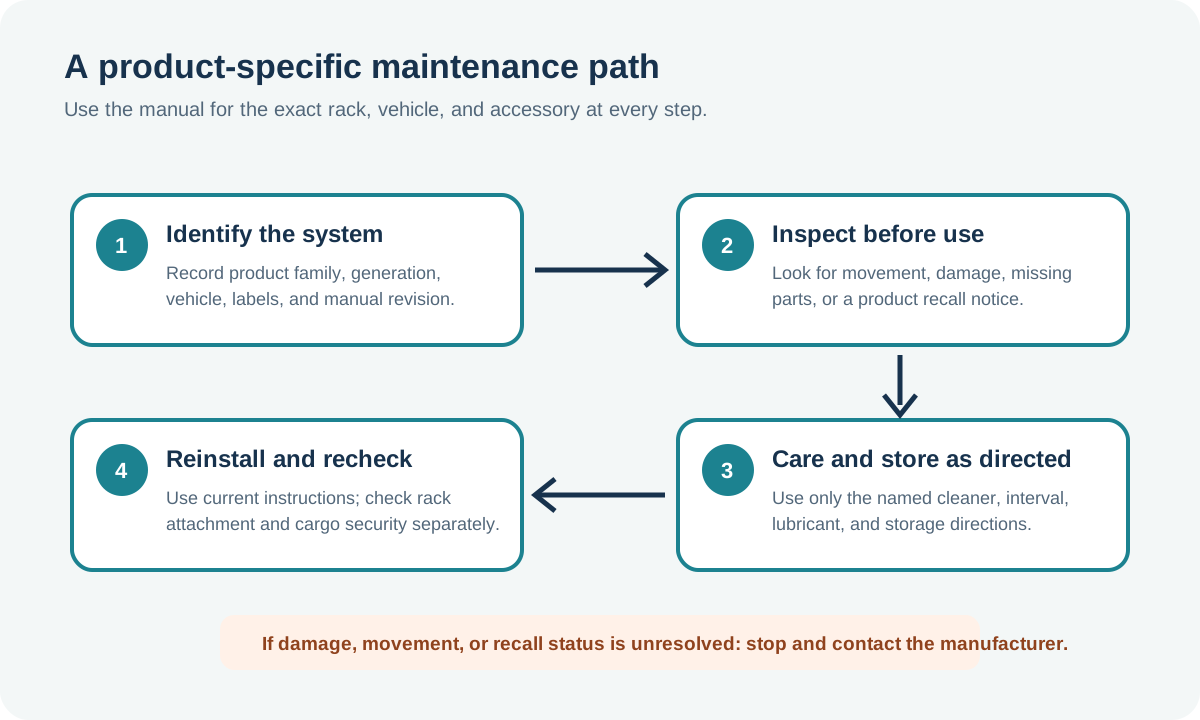
Use the latest instructions for the exact rack, vehicle, and accessory. A maintenance interval or repair step from one product family is not a universal rule. If the system has been transferred, modified, or partly repaired, confirm its identity and current vehicle fit before using the original checklist.
Start with a clear inspection
Before a trip, check the rack and the load as separate items. Look for missing hardware, visible cracks, bent or badly worn parts, corrosion, damaged pads or clamps, loose covers, worn straps, and locks that do not operate as expected. Look closely at the parts that contact the roof or vehicle mounting points. A clean appearance does not prove that a hidden or load-bearing part is sound.
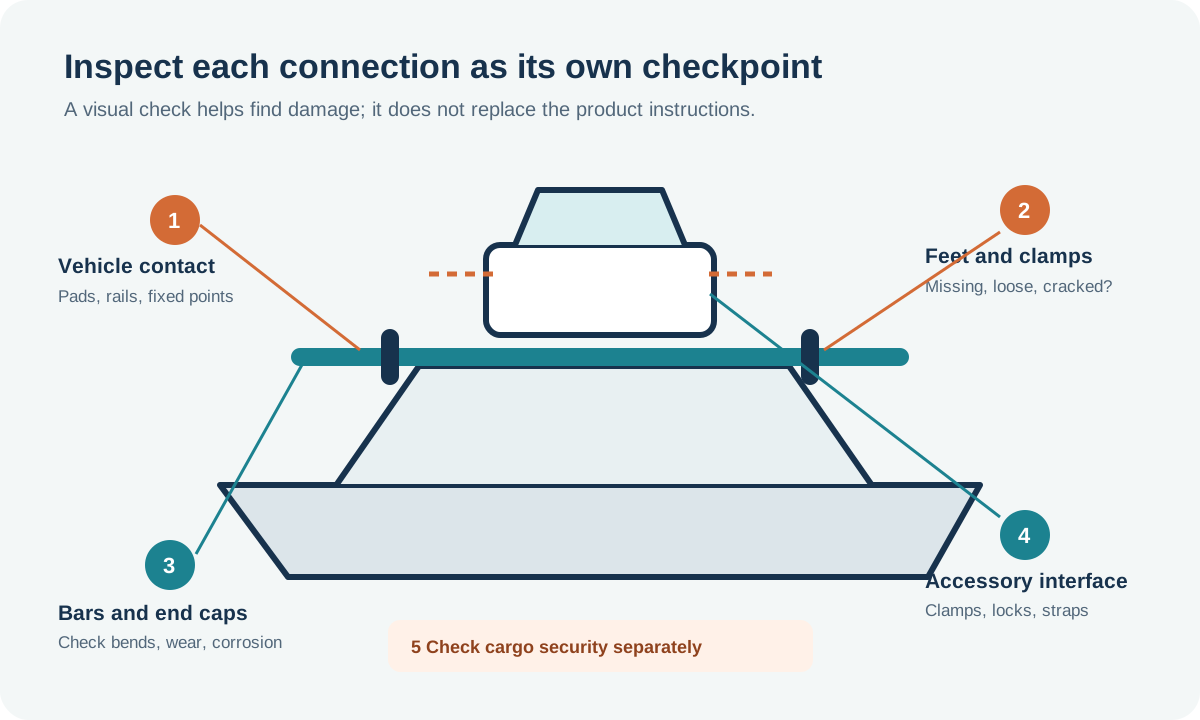
Follow the manual’s inspection method. Yakima’s maintenance article recommends a shake test for its roof racks and mounts and tells owners to inspect the hardware if movement is found. If a rack shifts, a component is damaged, or the instructions do not identify a safe repair, stop using the affected setup. Do not tighten a connection by feel when its instructions specify a tool, torque, or replacement part.
Use the product’s maintenance schedule
Manufacturers publish different cadences for different systems. For example, Rhino-Rack’s US fitting guidance says to check bolts and fixtures every 1,000 km (about 620 mi) and before every trip, with more frequent checks on unsealed surfaces. Yakima’s maintenance article recommends a monthly hardware check and annual removal and reinstallation for its roof racks and mounts. Thule’s general rack instructions call for regular tension checks, especially after rough roads, without setting one cross-brand interval. Follow the exact current instructions for your system; do not apply one brand’s schedule to another rack.
Some exceptions are especially specific. The Thule TracRac SR base-rail manual gives an average three-to-four-month check interval for its base-rail fasteners and rubber expansion blocks. In the same section, it says not to retighten crossbar fasteners or socket-head screws that feel loose; contact Thule for replacement fasteners with fresh adhesive and install them at the specified torque. This stop instruction applies to the named TracRac SR instructions, not to other systems.
Clean without damaging the system
Rhino-Rack’s US guidance says to hand-wash an installed rack with soap and water, avoid abrasive materials, and keep the vehicle out of automatic washing stations while the rack is fitted. Yakima likewise advises against taking a vehicle through a car wash with gear mounts installed and recommends removing seasonal equipment when it will not be used. Follow the instructions for removal and cleaning; avoid solvents, lubricants, or disassembly unless the product documentation allows them.
After use in winter or on dirty roads, clean the rack and its contact points as directed. For fabric accessories, Yakima advises airing them out and drying them fully before storage. A Thule Motion 3 roof box has its own storage direction: its instructions say not to leave the box outdoors exposed to rain or direct sunlight. These are product-specific examples, not a storage specification for every rack or carrier.
Store parts so the system can be identified later
When the instructions call for removing the rack or accessory, keep the parts together by system and label. Store keys, locks, bolts, end caps, tools, instructions, and any fitting-kit identifiers in a marked container. Keep a photo of the complete assembly and record its part or serial numbers. This reduces the chance that a small but vehicle-specific piece is lost or mixed with another generation.
Reinstall and recheck
Use the current installation document for the exact vehicle and product. Confirm that each piece is present, that the rack is attached at the specified positions, and that the correct tool and tightening procedure are used. Check the rack’s attachment as directed by its instructions, including any post-installation and regular checks. Thule’s general roof-rack guidance, for example, calls for checking the carrier’s attachment regularly and more often after rough roads. That guidance separately says to check load security after a short distance and at suitable intervals. Treat rack attachment and cargo security as separate checks; follow the current instructions for your exact rack, carrier, and load.
Check product recalls as well as wear
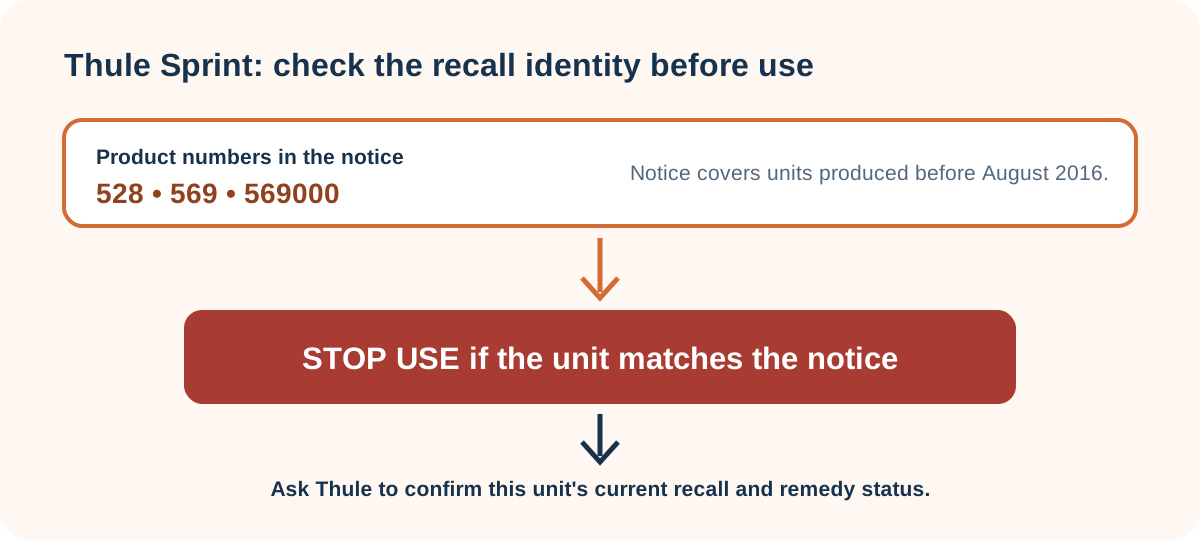
A product can look intact and still be subject to a safety recall. Thule’s recall notice identifies Sprint roof-mounted bike carriers numbered 528, 569, and 569000 that were produced before August 2016. The notice says to stop using an affected carrier. Check the product number and production details, then contact Thule through its current official recall support route to confirm the status and any remedy for that specific unit. The historical notice does not establish whether an individual carrier has already been remedied or whether a particular campaign option remains available today. Do not attempt to repair an affected clamp yourself.
Repair procedures can include hazards that are not obvious from the part’s appearance. For example, Yakima’s RailBar cover-and-latch instructions warn that a toggle is under spring tension during a named replacement procedure and require a positive click when its replacement cover locks. Use that instruction only for the identified RailBar kit. If you cannot confirm the model, part, or current procedure, do not improvise a repair—contact the manufacturer or a qualified rack dealer.
Sources and product references
Use these references to check the current instructions and fit information for your market and exact setup.