Compare model-specific mounting, deployment, ladder, and campsite checks without transferring one tent maker’s instructions to another.
On this page
Rooftop Tent Setup and Campsite Checks
The steps for mounting, opening, and using a rooftop tent vary by tent model. A ladder angle, rack position, or packing instruction from one manual does not automatically apply to another tent. Use this guide to identify the checks that matter, then follow the current instructions for the exact tent, rack, and vehicle.
This guide summarizes selected manufacturer instructions. It does not approve a vehicle-and-tent combination, replace the vehicle or rack manuals, or provide a complete installation procedure. Start with the vehicle and rack eligibility guide, confirm the measurements in the bar and mounting guide, and check the driving and parked limits in the load guide.
Plan the lift and mounting position
Before lifting a tent, confirm that the vehicle, rack, tent, and mounting hardware are approved together. Check the complete instructions for the required number of helpers and mounting sequence. Do not choose a lifting team by averaging recommendations from different tent makers.
The recommendations vary. Roofnest says to use at least two people and not to install alone; for tents over 200 lb, it says three or four people will likely be needed. The 23ZERO Kabari Z manual calls for a minimum four-person lift. These instructions apply to the named products, not every tent.
Position and secure the tent exactly as its mounting instructions describe. Thule’s cited tent manual says to mount the tent parallel to the road and not at an angle. It suggests at least 700 mm between rack bars only when the assembly instructions do not give a special position, and it prohibits altering the tent’s fixation system.
Roofnest recommends keeping the tent’s front or rear overhang to no more than one-third of its total length. Its guide also says to tighten both sides evenly and check the hardware again after about 20 miles of driving. These are Roofnest instructions; use a stricter or different requirement when the exact tent or rack manual says so.
Check orientation and support
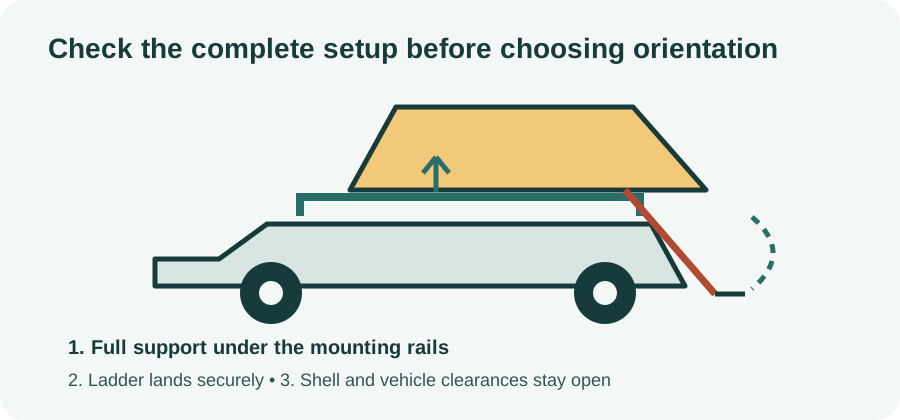
An opening direction can affect clearance. iKamper generally recommends its tents open toward the passenger side. It says reverse mounting may be possible only when the rack fully supports the tent, the ladder can deploy safely, and the clamshell can open fully. Reversal may change the direction of locks and hinges and can affect airflow or water flow. Check the exact vehicle and rack layout before choosing an orientation.
For a 23ZERO Kabari Z, its manual recommends a ladder angle of about 70–75 degrees and says no one should enter the tent until the ladder is locked and secured at the correct angle. The ladder may need adjustment for vehicle height.
For an iKamper SkyCamp, iKamper recommends setting up on level ground with the parking brake engaged. Release all shell latches, raise the shell, extend the lower panel fully until it locks, and then deploy the ladder. Its guide gives a 60–70 degree ladder angle and calls for stable feet on the ground. Minor features can vary by model, so check the exact manual.
Those ladder ranges are not interchangeable: the cited Kabari Z manual gives 70–75 degrees, while the SkyCamp setup guide gives 60–70 degrees. Use the instructions for the tent that is installed rather than a generic angle.
Apply campsite rules from the tent manual
The Thule manual cited here says to keep the tent at least 6 m from campfires and other flames and not to use fuel-burning or oxygen-consuming devices inside or close to the tent. It also says the ladder must remain in place to support the tent while deployed. Confirm that this manual covers your Thule model before applying its product-specific rules.
For the SkyCamp, the deployment guide describes fitting the rainfly and window tension poles after the ladder is stable. It also advises opening vents as needed. Do not treat those steps as a procedure for a different tent design.
Check the campsite before booking
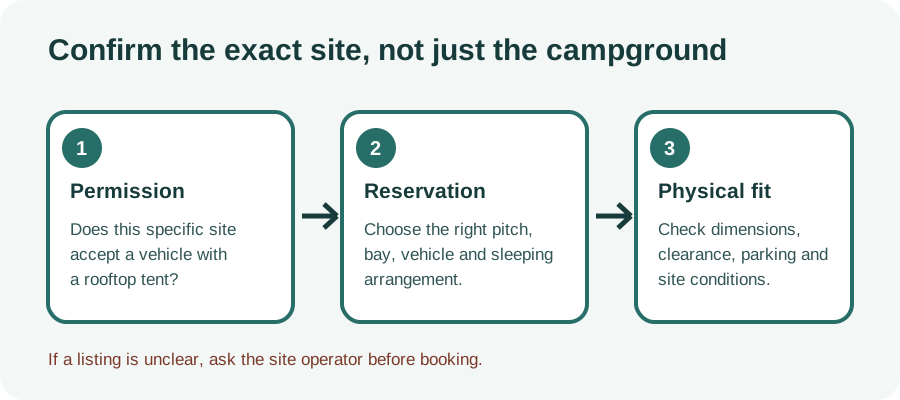
Confirm that the exact site accepts a vehicle with a rooftop tent and the way you plan to sleep. A campground label such as “tent site” or “vehicle camping” may not answer that question. Check the current reservation listing, equipment limits, parking area, and any special bay requirement before paying. For example, D.H. Day Site 47 says it is not suitable for rooftop-tent vehicles; Rio Grande Village’s group campground excludes rooftop tents; and Wawona Site 31 says there is no space to sleep in vehicles and does not recommend rooftop-tent use there. At North Lees, rooftop tents are accepted only when booked onto a dedicated campervan bay. These are site-specific conditions, not rules for other sites in the same park or elsewhere.
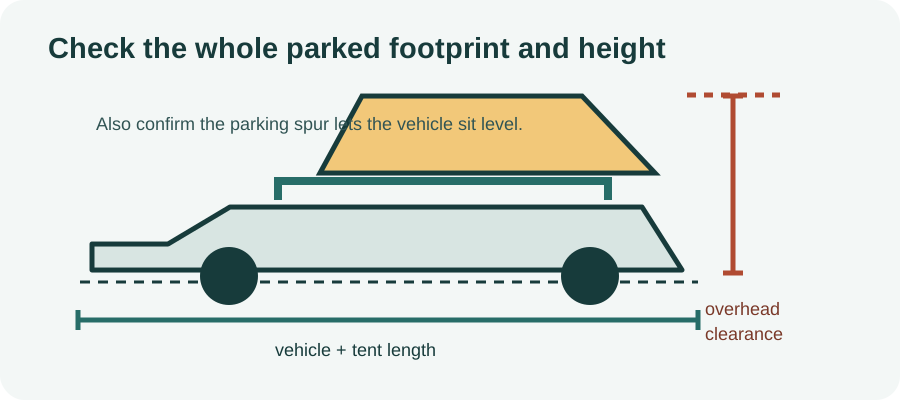
Check the physical space as well as the booking category: vehicle length, parking-pad size, overhead clearance, and whether the parking spur lets the vehicle sit level. The National Park Service campground design guidance calls out clearance and level parking for vehicle-and-tent sites, but gives no universal dimensions or slope limit. Ask the campground about the actual site when its listing does not provide enough detail. Keep the closed vehicle-and-tent height in mind when assessing tree limbs and other overhead hazards.
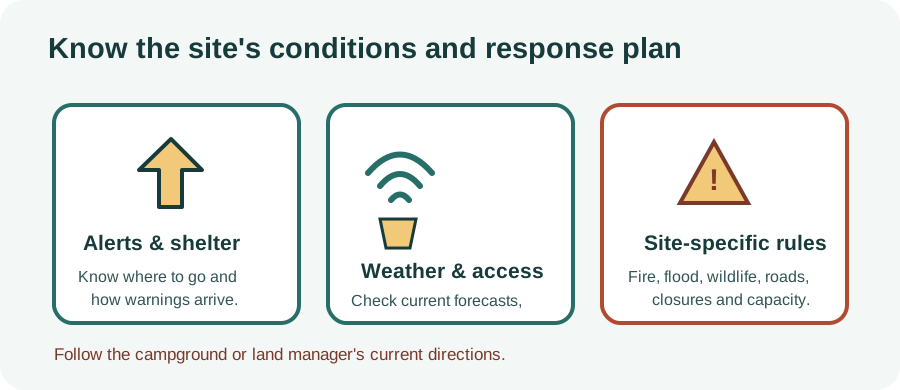
Before arrival, check the destination’s current weather alerts, storm shelter instructions, road access, and local fire and wildlife rules. The National Weather Service campground guidance recommends identifying shelter and alert arrangements in advance; its camping flood-safety guidance warns against low ground beside streams. For example, Sequoia and Kings Canyon National Parks says trees may fall even without wind and directs campers to a large building or non-convertible vehicle during lightning; tents are not a safe place to wait out a storm there. Follow the selected destination’s own current instructions. Park rules also differ: follow the land manager’s directions for roads, dunes, closures, food storage, and campsite capacity rather than carrying one park’s rule to another.
For fire and carbon-monoxide precautions, follow both the exact tent manual and local rules. The Thule manual cited above gives a 6 m separation from flames for tents it covers. The U.S. Consumer Product Safety Commission warns against using portable heaters or lanterns while sleeping in enclosed tents, campers, or vehicles; do not infer that ventilation or a rooftop location makes a device safe. Use only instructions that apply to the specific tent and equipment.
Close, secure, and inspect
Use the tent maker’s closing sequence before driving. Thule’s manual says the tent must be completely closed and its straps secured before travel. It also calls for regular checks of mounting brackets and racks on longer trips, including every two hours on rough terrain. The same manual advises drying the tent thoroughly before closing it and checking that the underside of the mattress is dry.
Other makers set their own inspection steps. Roofnest calls for a hardware recheck after about 20 miles. 23ZERO tells Kabari Z owners to check the tent’s bolts, hinges, and latches, and to confirm the rack remains securely mounted and undamaged. Follow the exact manual for the installed equipment and do not substitute one maker’s interval or procedure for another’s.
Keep the exact instructions with the setup
Before the first trip, identify the tent model and its current manual, then check the rack and vehicle instructions alongside it. Confirm the mounts are secure, required clearances remain open, the ladder is supported as specified, and the tent is closed and secured before moving. If the instructions conflict or leave a required fit or load condition unclear, ask the relevant manufacturer or a qualified fitter about the named configuration before using it.
Sources and product references
Use these references to check the current instructions and fit information for your market and exact setup.
- Thule Rooftop Tent Safety and Maintenance Instructionsprimary
- Kabari Z Installation & User Manualprimary
- Installation Guide — Roofnestprimary
- How to Set Up a Skycamp Series Roof Top Tentprimary
- Can I Mount My Tent Backwards?primary
- Site 47, D.H. Day Campgroundprimary
- Rio Grande Village Group Campgroundprimary
- Site 031, Wawona Campgroundprimary
- North Lees Campsiteprimary
- National Park Service Campground Design Guidelinesprimary
- Sequoia and Kings Canyon Camping Safetyprimary
- Campground Weather Safety and Preparednessprimary
- Flood Safety: Camping and Hikingprimary
- Portable Heaters & Camping Equipmentprimary