Choose a box around the gear you carry, the vehicle’s hatch and bar geometry, and the remaining roof-load allowance. Headline volume alone cannot establish usable capacity or fit.
On this page
How to Choose Roof-Box Size, Hatch Clearance, and Usable Capacity
Choose a roof box around the items you need to carry, then confirm that the box fits the installed vehicle and rack. A high litre or cubic-foot figure does not tell you whether skis fit inside, the hatch opens, or the vehicle has enough remaining roof-load capacity.
Start with the gear, not a box label
List the items for a typical trip and measure the longest, widest and tallest pieces. Include awkward shapes such as stroller frames, sleeping mats or folding chairs. Check the box’s internal dimensions, not only its exterior measurements or advertised volume. For long equipment, allow room for padding, closures and any pieces that cannot be packed at an angle.
Box-size labels are only rough guides. As examples, Thule’s UK and Canadian guides describe L boxes for skis up to 175 cm, XL for skis up to 200 cm, and XXL for equipment up to 215 cm. These are product-family use examples, not a guarantee that a particular box accepts an item or fits a particular roof. Check the selected model’s current internal dimensions and manual.
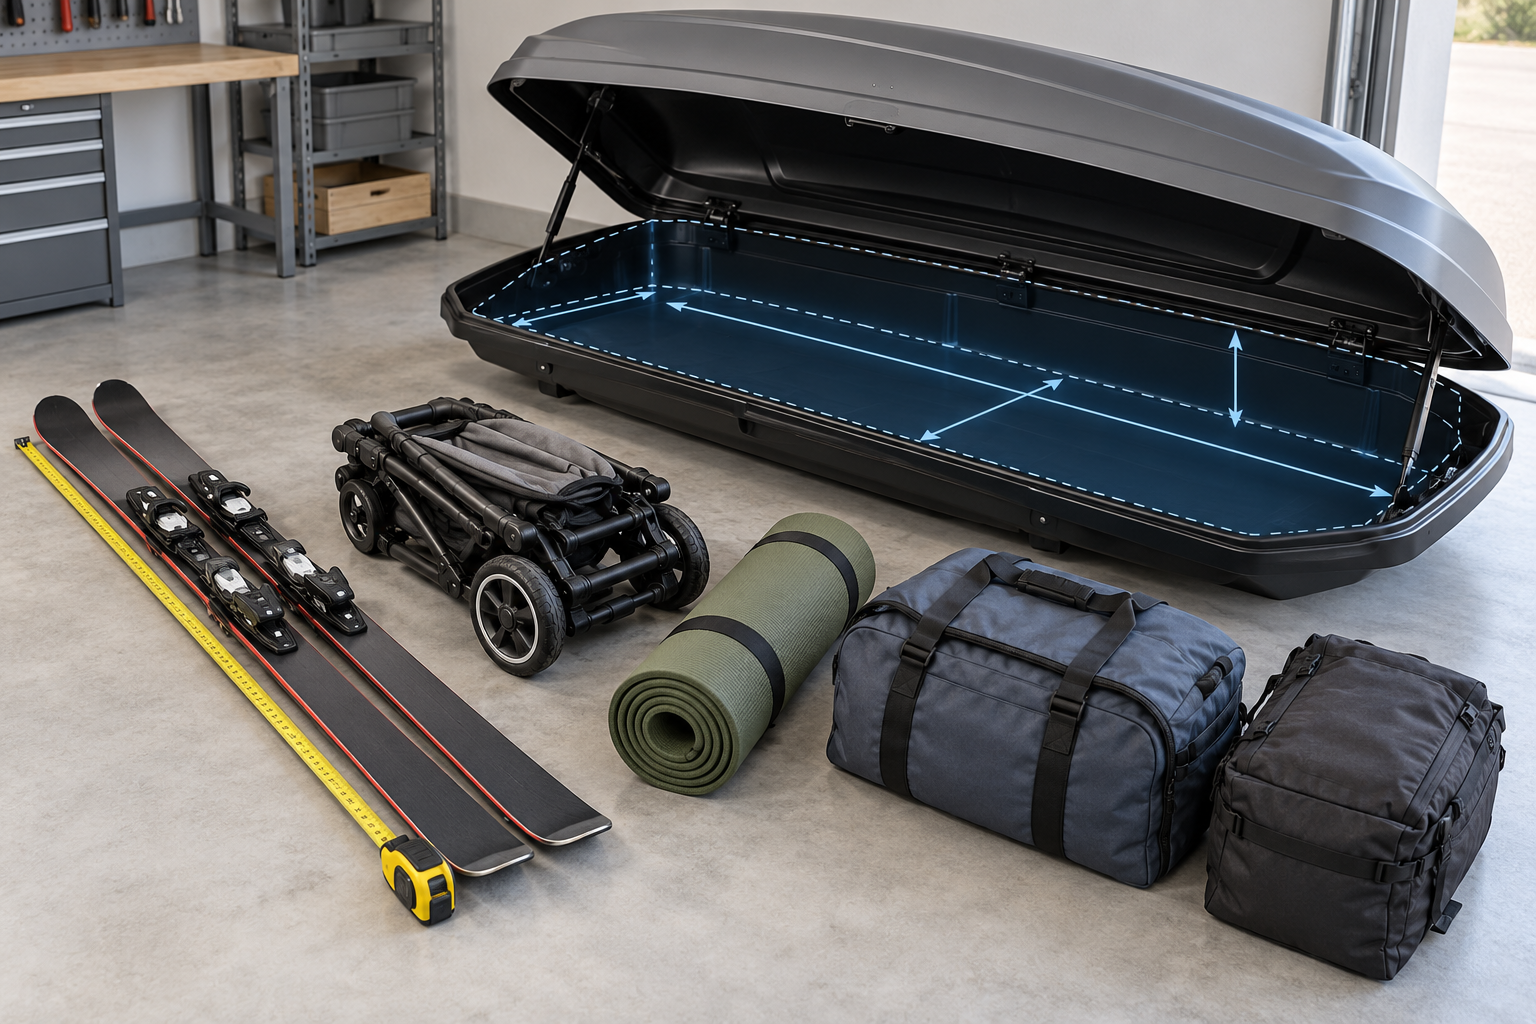
Think about the shape of the load too. A long, narrow box can carry skis while leaving some roof space beside it if the rack and other equipment allow that arrangement. A lower profile may help with total vehicle height; a wide box may reduce room for another roof-mounted accessory. Neither shape removes the need to check the vehicle’s roof limit and the box’s mounting geometry.
Measure hatch clearance with the rack installed
For a vehicle with a hatch or liftgate, perform the fit check with the intended rack installed:
- Open the hatch fully.
- Measure from the centre of the front crossbar to the point where the roof meets the open hatch.
- Compare that measurement with the minimum hatch distance in the exact box manual. Thule calls its product-specific value R-min.
- Measure the distance between the crossbars. This is bar spread; compare it separately with the box manual’s permitted range.
- Confirm that the mounting clamps fit the crossbar width and profile, and that the box sits straight without blocking the hatch.
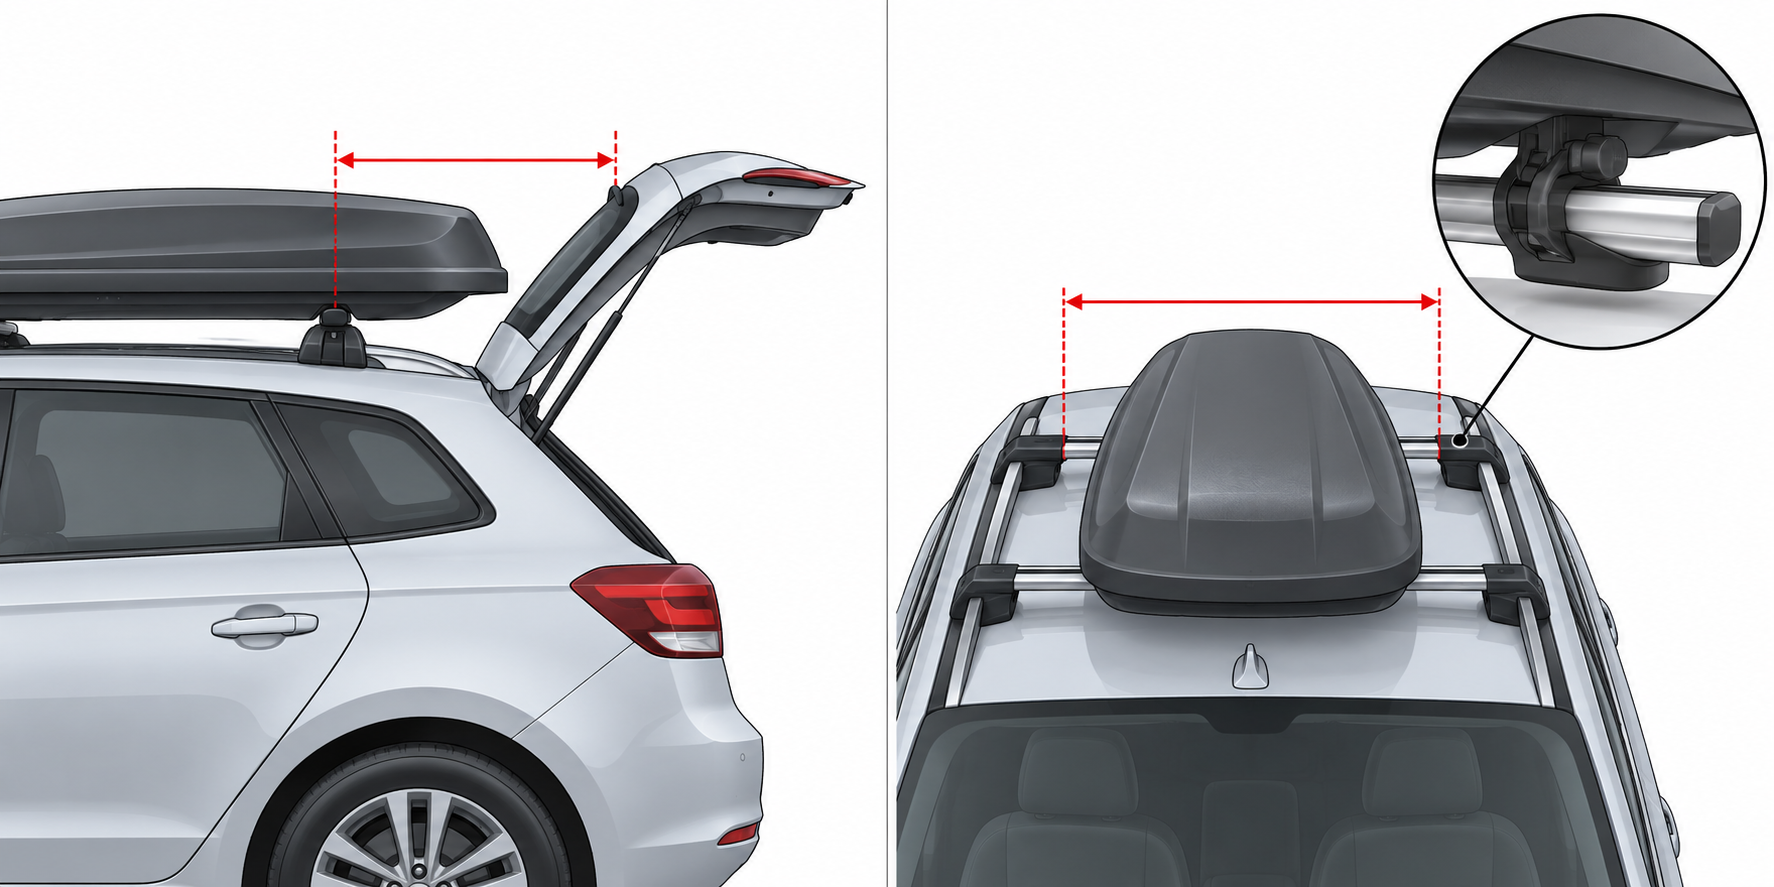
The UK and Canadian Thule guides use the same manual-led method. If the rack is not installed, the guides describe a B-pillar measurement only as a rough estimate. It is useful for narrowing options, but it cannot confirm fit.
Do not treat a box’s front-clearance value as a vehicle measurement. It is a box-side threshold. The installed result depends on the vehicle, crossbar position, rack instructions, box model and how the hatch moves. Do not slide bars or change mounting points unless the vehicle and rack instructions allow it.
Yakima’s US CBX LG page gives one model-specific example: a 24–35.5 inch crossbar-spread range and a 57 lb box weight. Compare the installed rack’s measured spread with the exact box instructions, and count the empty box weight against the applicable load limit. Those product specifications do not establish that the CBX LG fits a particular vehicle or rack.
Work out usable cargo weight
Use the vehicle manual’s driving roof-load limit. Subtract the installed rack, empty box and other roof-mounted accessories that count against the limit. The remainder is the maximum cargo weight available before applying the box and rack ratings. If any component has a lower limit, that lower limit also controls. Use the dynamic or driving limit, not a parked/static figure.
For example, a box may have enough internal space for a family’s luggage but leave too little allowed weight after the rack and empty box are counted. Pack dense or heavy items inside the vehicle when practical, and use the box for lighter bulky gear. Do not use an illustrative product capacity as a vehicle-specific load recommendation.
Check access and the whole trip
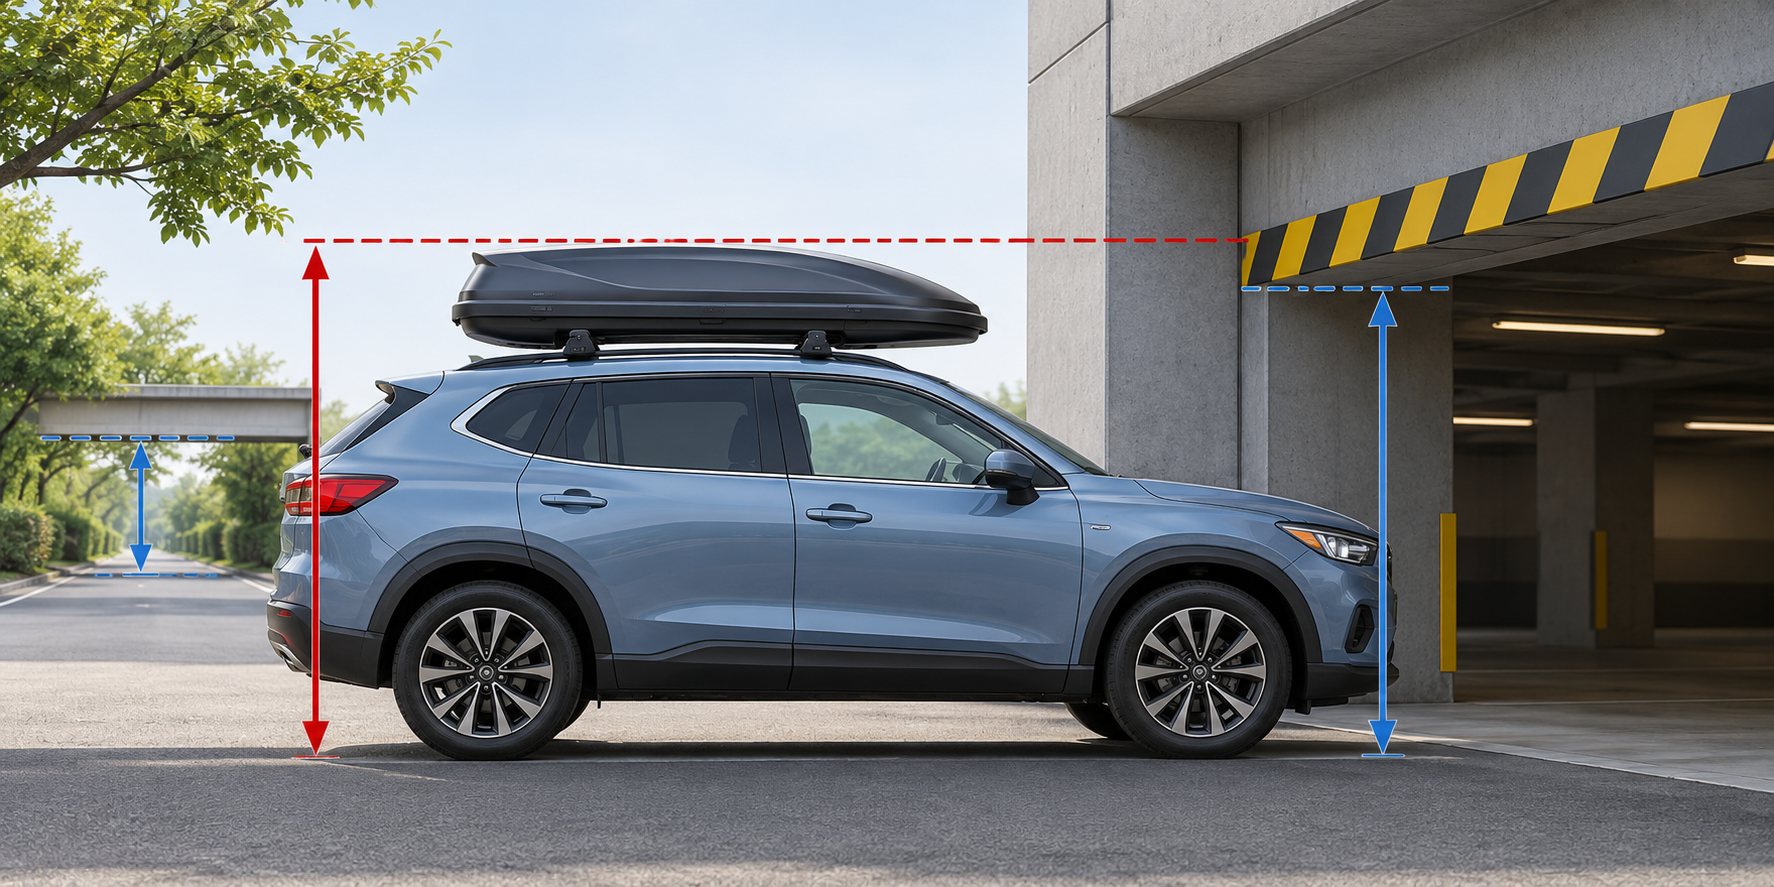
Measure the vehicle’s total height with the installed box. Consider garage doors, parking structures, drive-throughs and tree clearance along the route. Check the opening direction and whether you can safely reach the box from both sides. On a hatchback, test full hatch travel before loading.
The box should fit the gear without forcing a lid closed or exceeding its own load limit. Follow the box instructions for packing, clamping, closure and rechecks. If the fit depends on a specific model year, trim, roof type or crossbar position, verify those details in the manufacturer’s current vehicle-fit guide before purchase.
For a Crosstrek setup without crossbars, see the rack-first fitment path. Then use the loading checklist to check the installed load.
Sources and product references
Use these references to check the current instructions and fit information for your market and exact setup.
- Will a Roof Box Fit My Car?primary
- Will a Roof Box Fit My Car?primary
- Roof Box Buying Guideprimary
- Yakima CBX LGprimary
- How to Pack Safely with a Roof Boxprimary