Follow the Tesla Model Y roof-rack approval boundary, exact glass placement marks, clip checks, torque, and final movement test for the Tesla rack system.
On this page
Tesla Model Y Roof-Rack Installation: Glass Placement and Recheck
This guide covers Tesla’s roof-rack procedure for the Model Y and Tesla rack system. Tesla’s current North American owner’s manual requires a Tesla mounting accessory and a roof-rack system approved by Tesla. It does not approve third-party systems. Confirm your vehicle, market, mounting accessory, and current procedure before starting.
Confirm which procedure applies
Tesla’s Model Y Do It Yourself page says its illustrated procedure also applies to vehicles manufactured from approximately February 2025. The 2025+ Service Manual procedure was released on 27 April 2026 and updated on 9 July 2026 to include Model Y Standard. Read the live procedure for the exact vehicle before using measurements or tools from this guide.
There is a torque difference between Tesla’s public pages: the Do It Yourself page recommends 2.5–3.5 Nm, while the newer 2025+ Service Manual specifies 3.5 Nm for its procedure. Do not mix these into a single range. Use the current instruction that applies to your vehicle and rack; if that is unclear, ask Tesla service before installing.
Use the Model Y placement marks
The current Service Manual says to clean the installation locations with isopropyl-alcohol wipes and let them dry for one minute. It then places the front marks 227 mm back from the front edge of the glass roof and the rear marks 412 mm forward from the rear edge. The front and rear measurements are different.
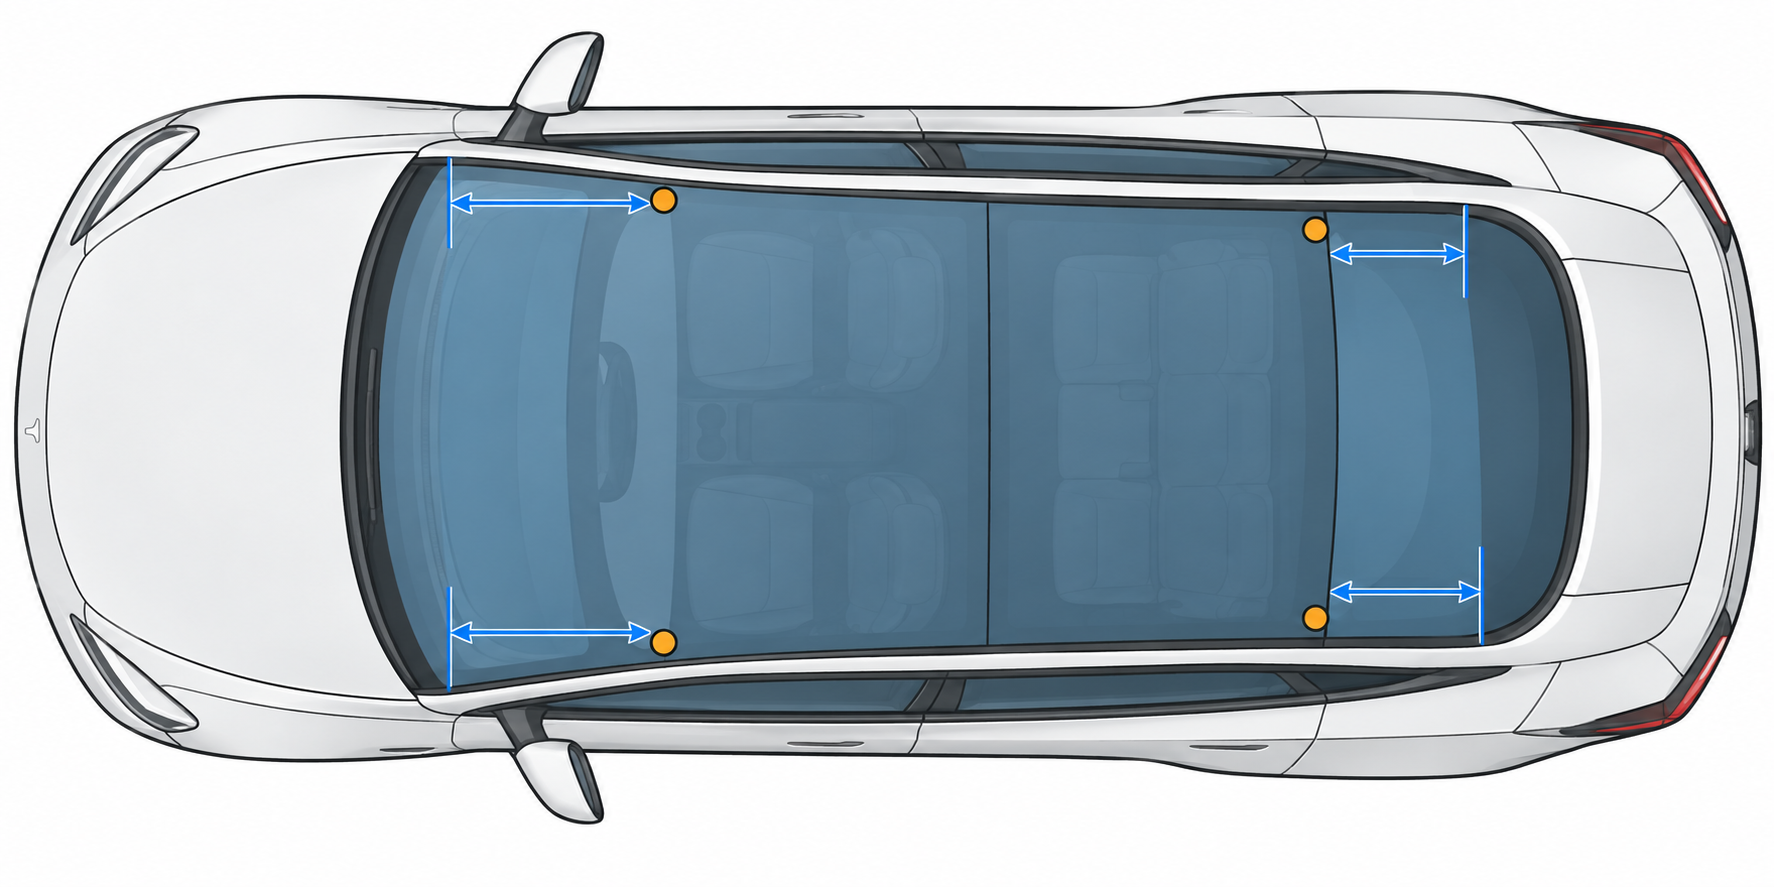
Align the arrows on the anti-abrasion tape with the marks shown on the glass and follow the trim line. On some Model Y Standard vehicles, an arrow may not be visible; the current procedure says to make a temporary mark with masking tape at the stated measurement, apply the anti-abrasion tape, and remove the temporary tape.
Seat the clips and tighten the bars
Use Tesla’s supplied trim tool to lift the seal at each marked location and insert the rail clip. Confirm that each clip engages the J-hook under the roof glass and is centered on the mark. Use the pad icons to place the correct pad at each corner. The front crossbar is longer than the rear; make sure the clip studs are vertical and the crossbar is positioned as shown.
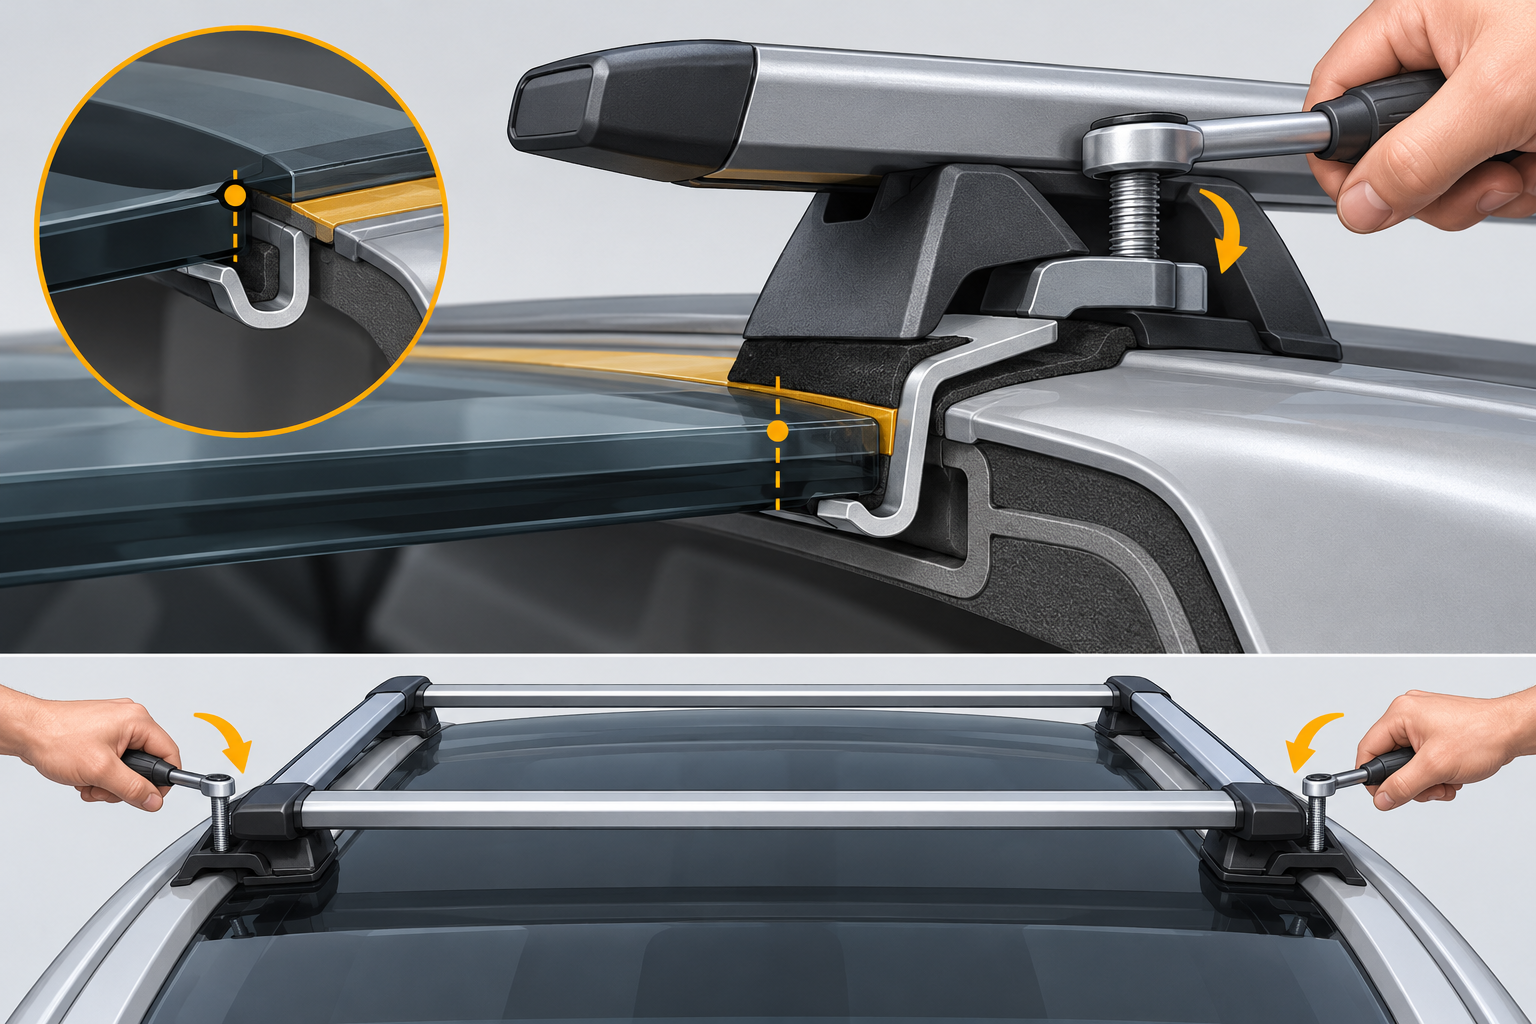
Hand-tighten the wingnuts on all four corners before torquing either side. The current Service Manual specifies 3.5 Nm and says to tighten both sides evenly to avoid damaging the glass. Align the wingnut and crossbar marks, lock both crossbars with the supplied keys, then push and pull each bar to check that it is secure and does not move. Install the covers as directed and keep the locking keys.
Do not continue if a clip will not engage, a pad or bar cannot sit in its marked position, glass or trim is damaged, or the fastener will not reach the specified condition. Do not use another rack’s measurements or torque.
Check capacity separately
This installation procedure gives no numeric Model Y roof-rack capacity. Tesla’s owner’s manual has a separate placard method for calculating overall passenger-and-cargo capacity; that figure is not itself a roof-rack rating. Use the current vehicle and Tesla rack instructions for the roof limit, then account for the rack, accessory, and cargo as those instructions define them.
After installation, repeat the no-movement check and recheck according to Tesla’s current instructions. If the Model Y’s production version, market, approved rack, or procedure cannot be confirmed, leave the system unloaded until Tesla resolves the question.
Sources and product references
Use these references to check the current instructions and fit information for your market and exact setup.