Use these go/no-go checks to confirm the vehicle, base rack, carrier, craft, load, clearance, and restraints before transporting roof-mounted water gear.
On this page
Roof Watercraft Pre-Trip Fit and Securement Checklist
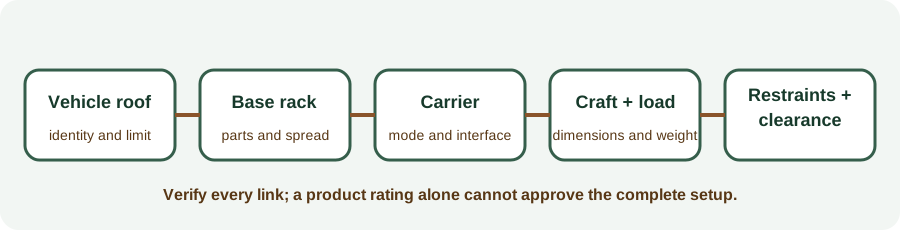
A roof setup is ready only when the vehicle, base rack, carrier, watercraft, load, and restraint path have all been checked together. “Fits most bars,” a carrier’s advertised capacity, or a previous successful trip does not verify a changed vehicle, product generation, or load. Use this checklist before loading and again before driving.
Decide whether roof transport is needed
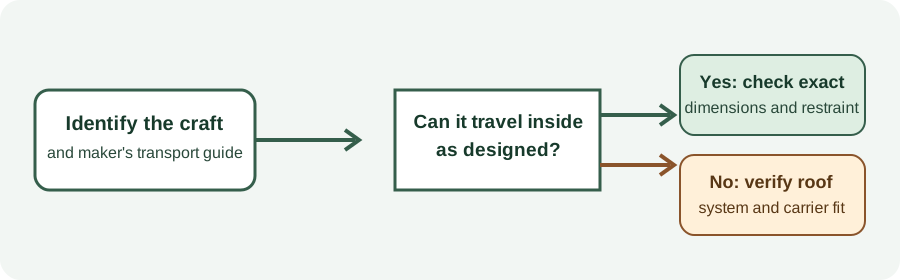
Before buying or installing a carrier, check how the selected watercraft is designed to travel. Oru says its foldable kayaks can be folded to suitcase size and do not require a truck or roof rack. That product-family statement does not give folded dimensions or prove that a particular model fits inside a particular vehicle. Compare the exact kayak’s current folded dimensions with the vehicle’s usable cargo space and confirm that it can be carried and secured as its maker directs.
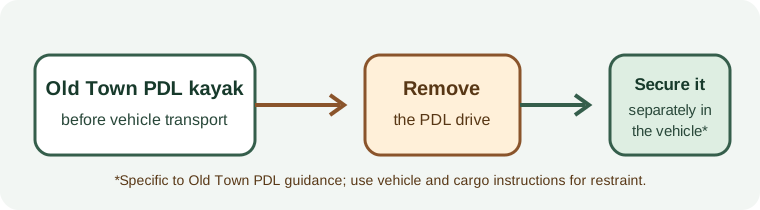
For watercraft that will travel on the roof, continue with the vehicle-to-craft checks below. A product-specific transport instruction may also require removing equipment: Old Town says its PDL pedal drive should be removed from the kayak and secured separately in the vehicle during transport. This applies to Old Town PDL systems; the page does not specify an interior restraint method. Check the instructions for the exact craft and secure loose components under the vehicle and cargo guidance.
1. Identify the exact vehicle
- Record the market, make, model, year, body or trim, powertrain where relevant, and roof configuration.
- Identify whether the roof has rails, fixed points, tracks, factory crossbars, or another system. Do not treat rails and crossbars as interchangeable.
- Open the owner’s manual and fit guide that match the vehicle’s market and production details. If a selector requests more information, do not substitute the model year alone.
Hold the trip if the correct roof system or manual cannot be identified. Vehicle instructions can change by market, trim, or production period.
2. Verify the complete parts path
- Record the base-rack brand and model, bar shape and dimensions, bar spread, and required mounting points.
- Match the carrier’s exact SKU and instructions to those bars. Confirm all adapters and required carrier hardware are present.
- Review the vehicle or product maker’s selector result for this exact roof configuration. Treat an unconfirmed or unmeasured result as unresolved until the manufacturer or a qualified fitter confirms it.
For example, Toyota lists separate RAV4 crossbar products for different applications; one US product page gives trim prerequisites and a 100 lb crossbar capacity. That listing does not establish a kayak-carrier fit by itself. The RAV4 guide explains the limits of the current 2024 examples.
3. Match every craft to its support
- Measure each kayak, canoe, SUP, or surfboard: weight, length, widest point, shape, and support/contact areas.
- Confirm that the exact carrier permits that craft and the selected one- or multi-craft arrangement.
- Check the carrier’s width, weight, bar-spread, and configuration limits. An unspecified value is unknown, not unlimited.
- For multiple craft, confirm usable bar length, side clearance, support for each item, overhang, and any remaining space for other accessories.
Do not assume that a two-kayak configuration also permits a kayak and SUP together. Product pages may specify separate modes. For example, Thule Compass describes distinct one-kayak, two-kayak, and two-SUP arrangements; those modes do not confirm an unlisted mixed load.
4. Reconcile all load limits
- Find the vehicle, base-rack, carrier, and craft limits in their current instructions.
- Check which weights each manual includes. Where an instruction requires it, count the bars, feet, carrier, adapter, and cargo rather than comparing only the craft to one product rating.
- Confirm that load distribution and the chosen carrier mode meet every applicable limit. Use the lowest applicable limit.
A product rating cannot increase a lower vehicle or base-rack limit. Do not reuse a number from a similar model or another market. A 2024 RAV4 manual representation, for example, has a roof cargo value that applies only when that is the correct manual for the vehicle; confirm the exact source before using it.
5. Confirm installation, anchors, and clearance
- Install the base rack and carrier exactly as their manuals show; check fasteners, orientation, and crossbar spacing.
- Route the craft straps through the carrier’s specified contact and load-bearing points. Use all supplied straps required for the selected mode.
- Attach bow and stern lines only to points approved by the vehicle and carrier instructions. If the manual calls for a specific anchor or adapter, fit it; do not improvise an attachment to trim or an unverified point.
- Check that the loaded craft clears the roof, hatch, doors, glass, spoiler, antenna, and adjacent gear. Confirm total height for the route.
- Recheck carrier fasteners, straps, and end lines after loading and after the first short drive, then at the intervals required by the product instructions.
Securement procedures are model-specific. Yakima’s JayLow instructions, for example, require bow and stern lines and specify a Hood Anchor in certain cases; Rhino-Rack and Malone manuals show different strap routes for their carriers. Use the loading and tie-down guide for examples, then follow the manual for your own model.
6. Make a go/no-go decision
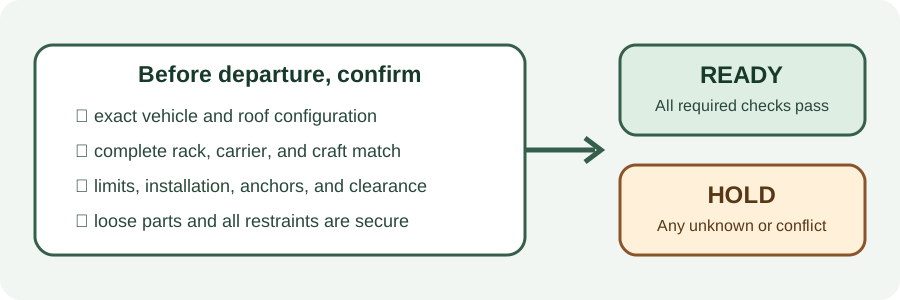
Ready means the exact vehicle and parts path are verified, the craft fits the documented carrier mode, every load limit is reconciled, the restraints and clearance are correct, and the hardware passes inspection.
Hold means any part is unknown, conflicts with another instruction, lacks a suitable approved tie-down point, or cannot be installed as directed. Remove the unresolved assumption by checking with the vehicle or product maker or a qualified fitter before carrying the craft. Do not try to compensate for an unknown rating with extra straps or a lighter driving speed.
After departure, roof cargo may change vehicle handling in wind, braking, and cornering. Recheck the load as the manuals direct, and stop safely if any strap, mount, or craft shifts. The watercraft layout guide helps plan multi-craft space; this checklist confirms the final setup.
Sources and product references
Use these references to check the current instructions and fit information for your market and exact setup.
- Toyota Genuine Roof Rack Cross Bars PT278-42151primary
- Toyota Genuine Roof Rack Cross Bars — Adventure Model PT278-42191primary
- Find the right gear for your vehicleprimary
- JayLow J-Cradle Rooftop Kayak Mountprimary
- JayLow Rooftop J-Cradle Kayak Mount Instructionsprimary
- Thule Compassprimary
- Nautic 570/580 Side Loading Kayak Carrier Fitting Instructionsprimary
- MPG107 Instructions — SeaWing V-Style Kayak Carrierprimary
- How to Secure Your Loadprimary
- Foldable Kayaksprimary
- PDL Drive Informationprimary
- 2024 RAV4 Owner's Manual OM42869Uprimary